 I have a real bias against the use of loose glitter. Opening a jar is like opening Pandora’s box: glitter flies everywhere, and ends up tracked all over the house. I also have trouble keeping the stuff attached to my work, in the density and location I desire.
My solution: glitter glue. I love the stuff. However, I find the glitter glues sold at most craft stores to be too thick and globby for my taste. For a long time, I used Elmer’s 3D Glitter Glue, which blended a very fine glitter with a gel binder the consistency of—-well, gel glue. When this glitter glue became hard to find in anything other than multi-packs of colors I don’t really want, the next natural step was to blend my own, using ultra-fine glitter and Elmer’s Clear School Glue. It’s a little more viscous than their glitter glue, but much cheaper, and I get to blend my own colors. Now, I’m only limited by the colors of glitter I can find.
To make your own glitter glue, you’ll need:
- Elmer’s Clear School Glue. Don’t get the blue tinted stuff. I’ve tested it, and it really does stay slightly blue when it dries. Buy clear.
- Ultra fine glitter. This is sometimes marketed as fairy dust. It’s tiny. Don’t use standard glitter, because it’s too big and clunky. You want the really super fine stuff that almost looks like powder.
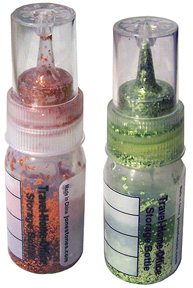
- A squeeze bottle with a fine tip. I buy mine in the fabric paint section of my favorite craft store. I think they’re by Jones Tones, and they have a clever little top on them designed to keep liquids from leaking out. This helps keep the glitter glue from drying out for a longer period. Alternately, you can save the applicator bottles from fabric paints or alcohol inks, but you’ll need to make the hole in the tip just a little bigger for glitter to pass through it.
Now is probably a good time to say that this glitter glue doesn’t store well for long periods. It will keep for a week or two, but after that, it starts to separate, and the glue dries out. I find making a small amount, for whatever project I’m working on today, is best. I can always make more next week.
Why bother? Because I can get exactly the color I want, when I want it. If I need sage green iridescent, I can mix up a batch, use it up, rinse out the bottle, and make another color tomorrow.
OK, back to the lesson…
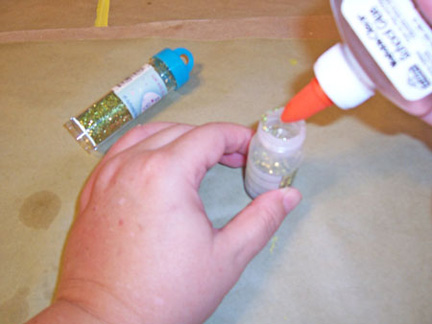
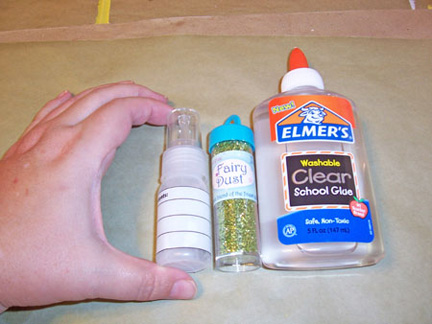 Here are the items you’ll need: clear gel glue, ultra fine glitter, and a bottle with an applicator tip.
 The ratio we’re going to use is two parts glue to one part glitter. We’re going to make a sandwich of the glitter between layers of glue, so the glitter won’t stick to the bottom of the bottle, or get caught in the lid. We also want to leave enough air space in the bottle to allow for adequate blending.
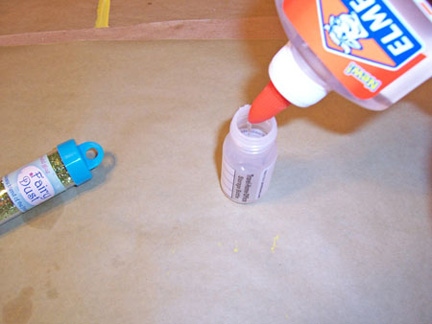
So, mentally divide your bottle in quarters. Fill the first quarter with glue.
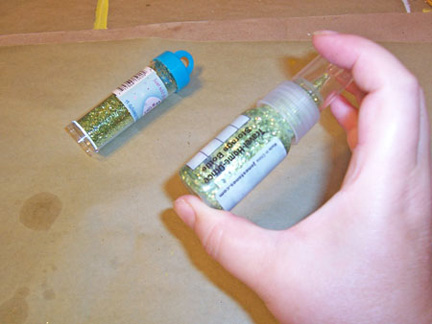
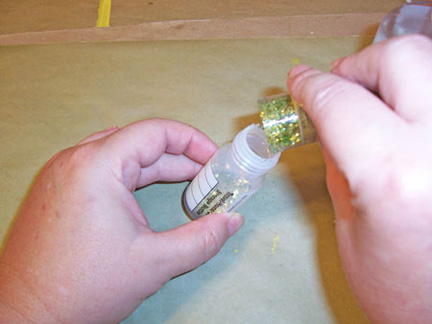 Fill the second quarter of the bottle with glitter. Try to keep it in the center of the bottle, rather than pouring it in along the sides.
 Fill the third quarter of the bottle with glue. Cover that glitter up completely.
 The fourth quarter of the bottle is room for shaking. Shake hard. At first, you’ll hear the glitter rustling. When it stops making noise, and sounds like a liquid, you’re done.
That’s all there is to it. Glue. Glitter. Shake. You’re done!
Be sure to do the first squeeze of your new glitter glue on a piece of scrap paper. Very often, the shaking will force plain glue up into the tip, so your first squeeze will be more glue than glitter. Once it works its way out, and you get the nicely blended stuff to the tip, it should be smooth sailing.
nice recipe! I should give it a try to make a glitter glue with this recipe!!
Finally found some small bottles….made the first batch today and the grandkids love it….I added a little extra glue because at the rate they are using it, I’m going run out this weekend…LOL
Probably an obvious question but does the glitter become dull once the glue dries?
Nope.