
Simple, But Flexible
I’m always on the lookout for simple background techniques that can be used in my art journals and altered books. This easy background uses materials I almost always have on hand: dictionary pages, gesso, and an inkpad.
I generally don’t color my backgrounds until I have at least part of the main imagery applied, so this black and white technique is just the ticket. It can easily be colored later with the same media I’m using to create the rest of the page: pastels, or watercolors, or acrylics.
Materials
To make a basic background, you’ll need:
- A base. I used 140 lb watercolor paper for the sample pieces shown in this article , but you can use whatever paper you wish. You might also choose to do this technique directly into your current art journal, or into an altered book.
- Dictionary pages. While I usually use vintage dictionaries in my work, for this technique, white pages work best, so a newer dictionary is more appropriate. You can generally find old, outdated dictionaries in the clearance section of your favorite used book store.
- Matte medium.
- White gesso, and brushes or sponges to apply it.
- Black ink. I used a black pigment inkpad.
- A stencil, or some sequin waste.
- A heat gun.
Instructions
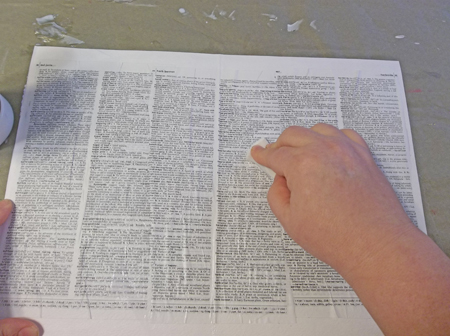 If you’re working on blank paper, or in an art journal, start by applying dictionary pages to the base, using a light coat of matte medium. Let this layer dry.
If you’re working in an altered book, and the text on your page is visually acceptable, you might opt to skip this step.
In these samples, I opted to apply the dictionary pages whole. To vary the look of this background, you might choose to tear yours into strips or pieces, and apply them randomly.
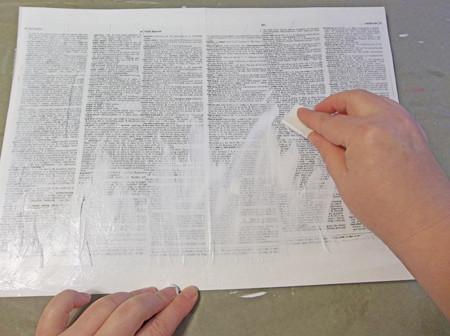 Apply a little gesso along the bottom edge, and use a sponge or a dry brush to blend it upward unevenly.
I used gesso here, rather than white acrylic paint, because gesso is designed to be a ground for other media. It makes a better base for water-based media like inks, paints, and glazes. Acrylic paint will often repel water-based media.
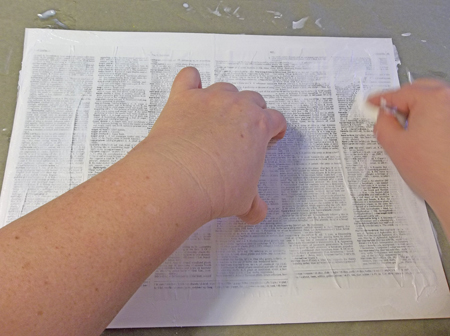 Work your way around all four sides, adding small amounts of gesso, and blending inward. Start with a light application, and build up until you’re happy with the look. Let this layer dry completely.
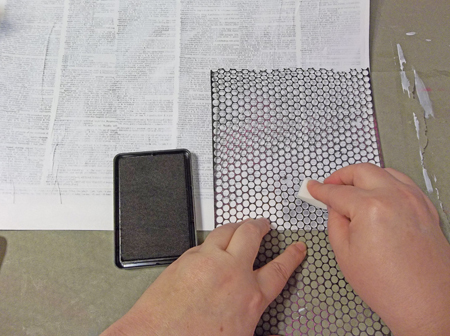 Lay a stencil or a piece of sequin waste over the gessoed background, and use a sponge or applicator to apply ink over it randomly. You can make this as sparse or as dense as you wish. You can also use this layer to frame areas of the page you might want to use as a journaling block later.
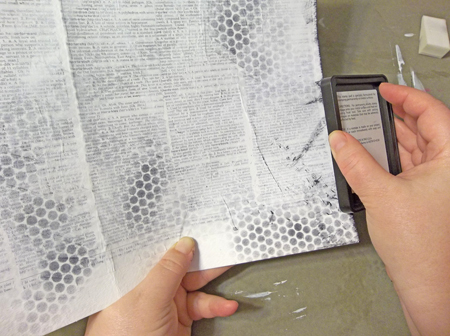 Use the inkpad directly to the paper along the edges, swiping inward. Again, you can vary the density of this layer, according to your own preferences. A heavy application around the edges creates a nice frame to your pages, but, if done in black ink, can feel a bit heavy or ominous.
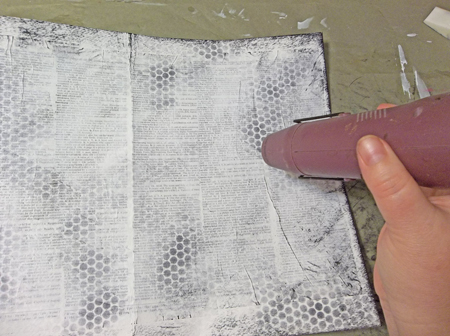 Set the ink with a heat tool.
Here’s another reason I opted for gesso in the earlier step: acrylic paint will bubble if a heat gun is applied to it. Gesso has a much higher tolerance for heat, which allows me to heat set the inks without worrying about blistering the background.
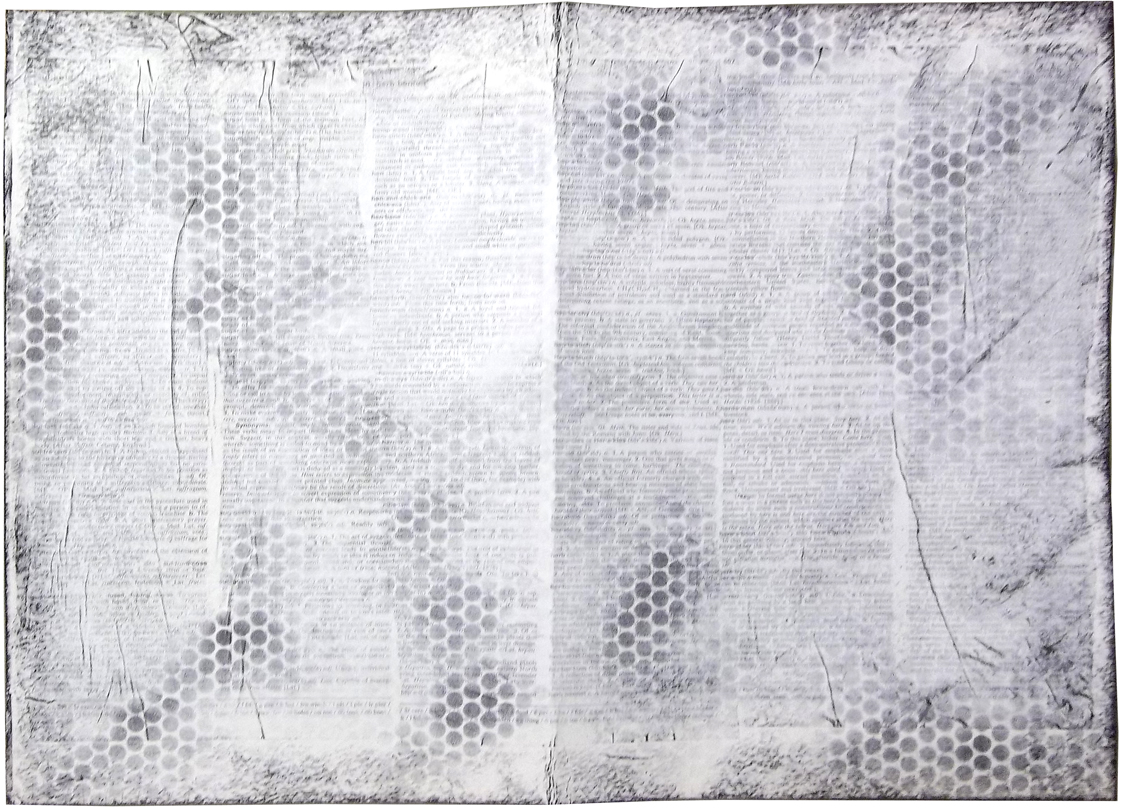
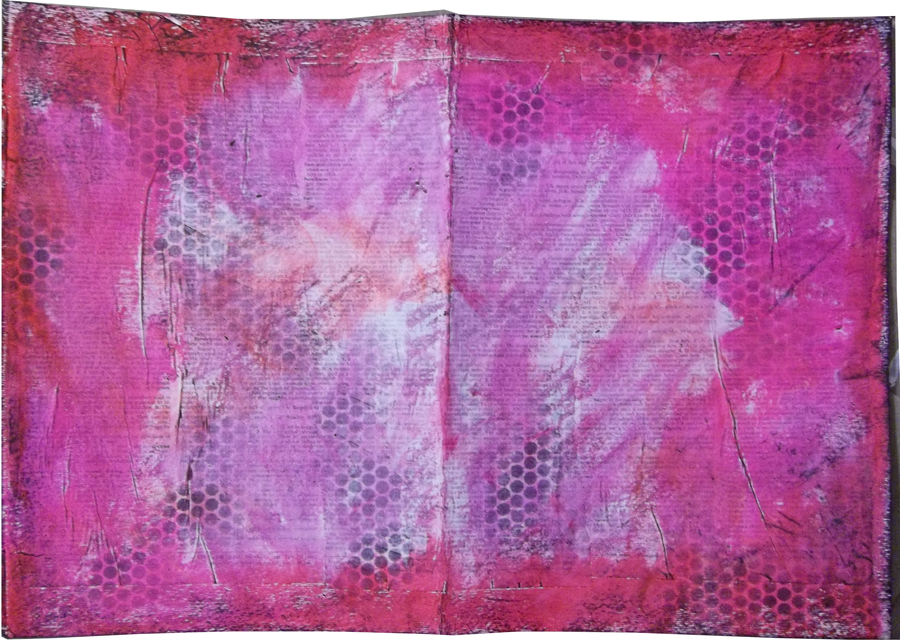
Here’s the basic background, ready for its next layer. From here, you can go in many different directions.
To create the background shown below, I used three colors of water-soluble pastels over the top of my sample page. It’s simple to color the basic black and white backgrounds with pastels, watercolors, acrylic glazes, chalks, inkpads, or whatever you have at hand.
This article was originally published in the January 2013 issue of The Monthly Muse.
I am a beginner to all this art and collage books. I don’t know how to comment positively to what I am learning except here in this comment section. Thank you for all your instruction and advise on how to proceed and what I should look out for (pitfalls). I know this material is old, it’s 2023, but I am new and learning. Thank you.