
Of all the expensive, hard to manage supplies I’ve come across, crackle finish wins as both ridiculously costly, and annoyingly unreliable. When I first heard of crackle finishes being done with consistently good results, and with a cost effective medium, I was dubious. I was wrong. You really can get a great crackle finish on cardstock, chipboard, wood and even fabric using—-wait for it—-Elmer’s Glue All, which costs less than a dollar for a 4 oz. bottle if you hit a back to school sale.
To make your crackle finish, you’ll need:
- Elmer’s Glue All white glue. This technique may work with other white glues, but I haven’t tried them. I do know it doesn’t work with Tacky Glue.
- Acrylic paints. I used the cheap stuff, as always, because I wanted to let some of the base coat show through the top coat. You’ll need two colors. For my samples, I used teal and black as base coats, and a mix of white and yellow ochre for the top coat.
- A wide bristle brush, an old credit card, or scrap of chipboard.
- A surface. I did my samples on cardstock and wood. I’ve seen this done on muslin, too.
This is a technique you’ll want to test, on a surface similar to what you want to crackle. Results may vary widely, due to surface choice, paint viscosity, and weather conditions.
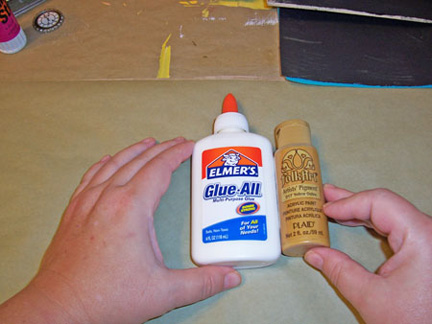 Here are your basic materials: Elmer’s Glue All, and cheap acrylic paint.
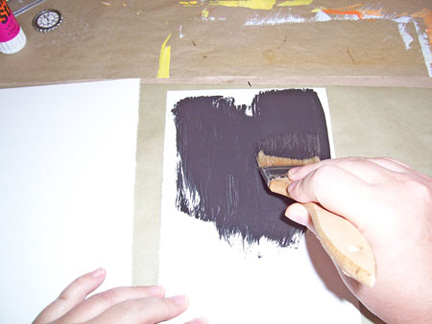 Start by base coating your surface with paint. You can do this in one color, or several. Whatever you use with show up as the crack part of your finished piece—that is, your base coat will show up as the cracks between the pieces of your top coat color.
Let the base coat dry completely. This is very important.
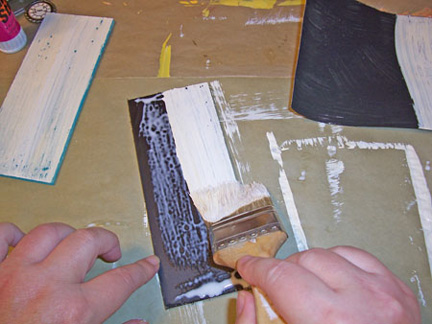
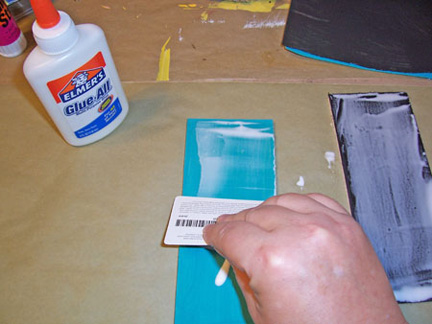 Apply a coat of glue, using the applicator of your choice. A thick layer of glue seems to give bigger cracks, while a thinner one seems to give finer, smaller cracks.
 One of the things I noticed was using a brush horizontally to apply the glue seemed to give more horizontal cracks.
Let the glue dry until it’s just tacky.
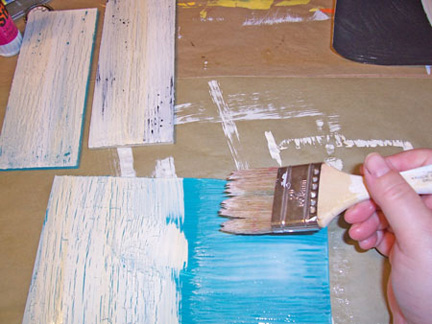
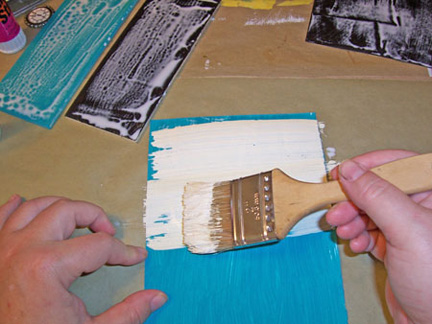 Load up your brush with the top coat color, and apply it in even strokes over the tacky glue layer. Try to do just one pass over each section of glue for best results.
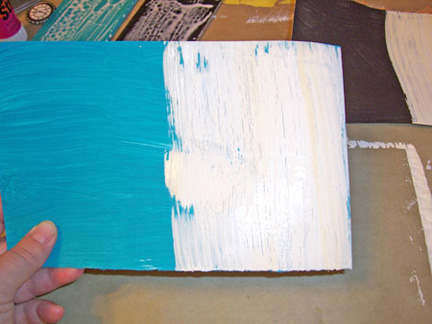 The surface will begin to crackle very faintly almost immediately. Don’t hover, because at this point, you can’t change the results you’re going to get. Put your piece down, and walk away for ten minutes. The surface will continue to crackle until all layers are dry.
 I noticed that the glue took longer to get tacky on wood than it did on cardstock, but the results were fairly similar.
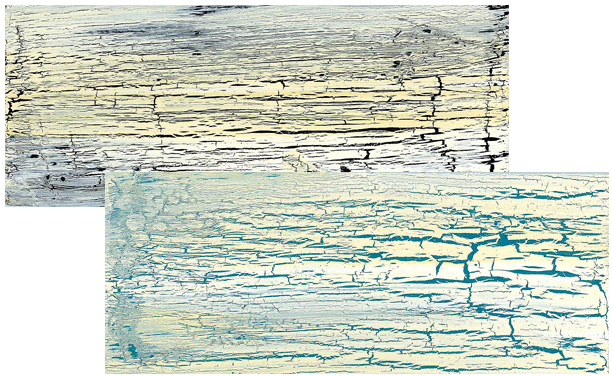
And the results? Here we go:
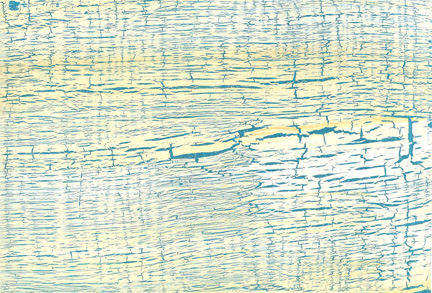 Cardstock base.
Glue applied vertically, with a brush.
Top coat applied horizontally, with a brush.
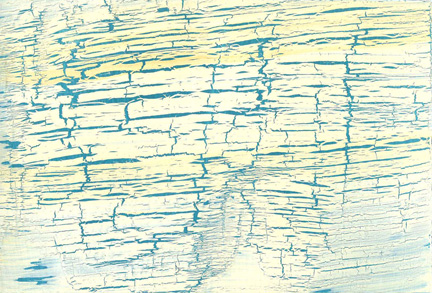 Cardstock base.
Glue applied horizontally, with a credit card.
Top coat applied horizontally, with a brush.
 Cardstock base.
Glue applied horizontally, with a credit card.
Top coat applied horizontally, with a brush.
 Cardstock base.
Glue applied vertically, with a brush.
Top coat applied horizontally, with a brush.
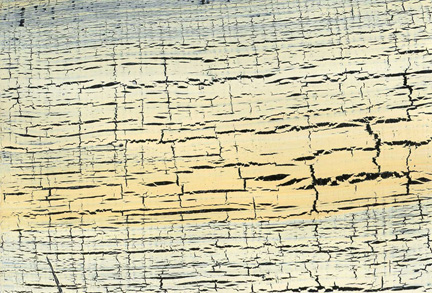
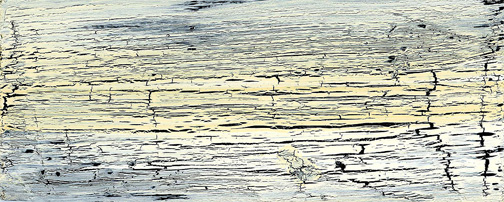 Wood base.
Glue applied horizontally, with a credit card.
Top coat applied horizontally.
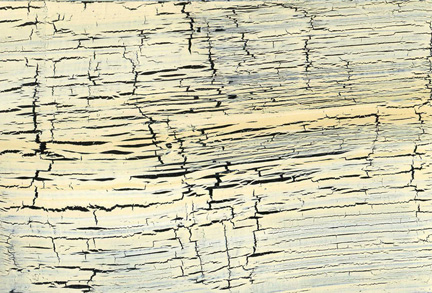
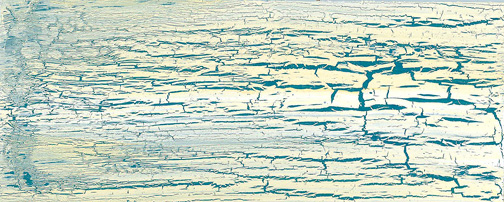 Wood base.
Glue applied horizontally, with a credit card.
Top coat applied horizontally.
Wow! That’s nifty! Thanks!
Omg this is amazing!!!! I’m about to crackle paint everything in my house lol. It’s so much cheaper than buying the bottles of it. This just made my day!
Wooo!! Thanks!
Thank you for this information. And thank you for showing all of the results based on using a credit card or brush and horizontally Etc. You are awesome
I want to see the results if you apply the glue in circles
Then you should try that, and see what happens!
Will the paint chip and fall off easy? Or should you seal the furniture when done?
Since this is a mixed media technique, and not one for furniture, I can’t really advise you on this.
AWESOME! THANKS!
Thank you! I over cleaned a dresser top with crackle finish and on a whim looked up DIY faux finish crackle.. Yours is the first sight I tried and wanting to fix it asap to avoid explaining my cleaning mistake I read through your steps and fifteen minutes later had given it a shot. I keep slot of art supplies handy. AMAZING… you cannot tell the difference except maybe the dresser top looks very clean.😃
Been using Elmer’s glue for the paint crackle effect for over 45 years! Loved it then and love it now!❤️